Skip to content
Sweet and Woodsy
Sweet and Woodsy

  • Home
    • WELCOME TO SWEET & WOODSY AROMATHERAPY!
  • About
    • Policies
  • Shop
    • Aromatherapy Household Cleaning Search for products
    • Personal Care
    • Mommas & Babies
    • Essential Oils & Blends Search for products
    • Etcetera
  • Services
  • Blog
    • Essential Oil Profiles
    • Community Happenings
    • Aromatherapy
    • Product Introductions
  • News
  • Events
  • Contact
Sweet and Woodsy

How to Have Glitter on Your Gel Polish Nails at Home

Having a beautiful gel manicure is a heavenly feeling. If you have glitter on your LDS gel nail polish, it makes your nails look more attractive than ever. But the question is whether you can have glitter on gel polish. Also, people can have doubts whether they need to visit the salon for a glittering job. The answer to both these questions is simple:

It is perfectly safe to have glitter on top of your gel polish nails.

You can have the glitter done at home. You do not have to go to a salon for that.

Let us now see how to get glitter on your LDS nail polish at home.

How to Apply Glitter on Your Gel Polish Nails at Home

Prep your nails and get ready for the job

As usual, the first step is prepping the nails for the manicure. The prepping part is the most crucial of any manicure. Hence, it does not matter if you spend more than 50% of the total time prepping your nails. The better you prep them, the better is the manicure, and the longer it lasts.

Start your prepping by cutting and filing the nails into shape. It is the right time to cut your nails because it will not be possible after you finish the manicure. Next, use a nail file to smoothen the edges. If they remain sharp, they could damage the manicure because of the chipping or lifting of the polish layer.

Attend to your cuticles by pushing them gently back into their sockets. Getting nail polish on the cuticles is an absolute recipe for disaster as the polish layer will certainly lift after a while and damage the manicure. Instead, buff your nail surface and rough it up to allow the basecoat to stick to the nails.

The basecoat application

Once the nails are prepped properly, you can proceed with the LDS gel nail polish job. Apply the basecoat in thin strokes using a clean nail brush. Cure each layer under the UV lamp before proceeding to the subsequent one. Generally, one layer of basecoat should suffice. However, if you wish to have an additional coat, you can do so. But, you should remember to cure the initial layer to get the best results. The curing should be for a minimum of 60 seconds to ensure that the basecoat dries properly.

The gel coat layer

Once the base coat is cured, you can proceed with the gel color application. The best way is to apply the gel polish from the nail base towards the edges in a straight line. Besides, it is necessary to cure each layer before proceeding further.

The glitter application

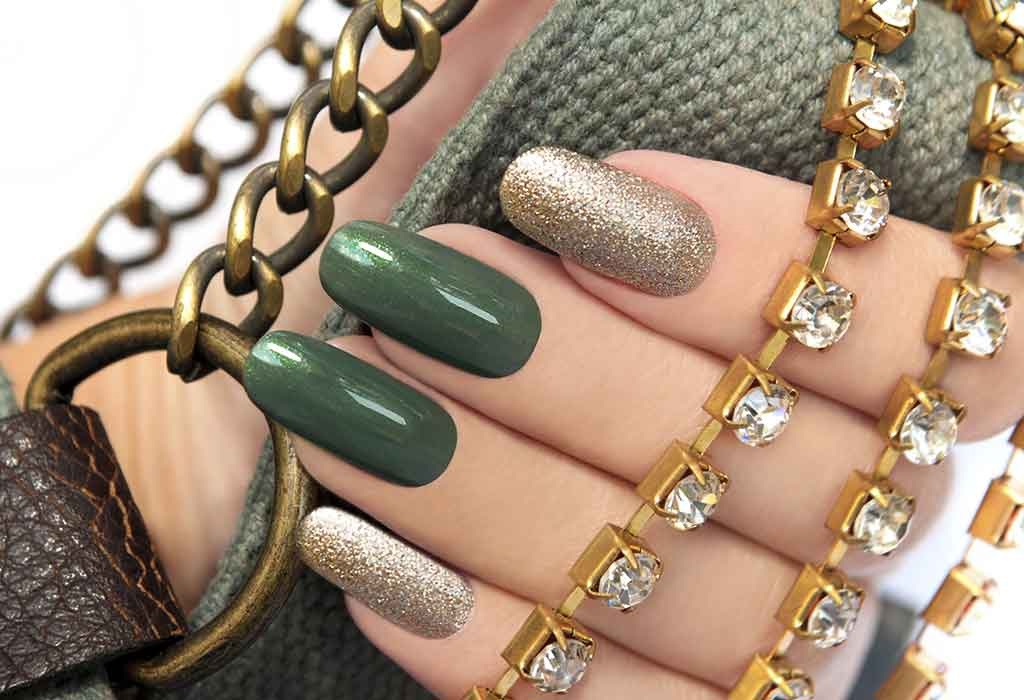
If your nail is tacky, you can immediately proceed with the glitter application. However, if it appears a bit dry, you should apply the basecoat again. Take a fluffy brush and dab it in the glitter bottle. Pat your nails with the brush until it gets covered with a generous layer of glitter. The best aspect of glitter is having different colors to suit your preferences.

Wait for a while and allow the glitter to stick to the LDS nail polish. Then, use a fluffy brush and remove any excess glitter loosely present on the nail. It ensures that you have an even coat and the nail does not look thickly painted.

The topcoat application

Apply the topcoat one layer at a time on top of the glitter. Take care to cure each layer under the UV lamp for 60 seconds. If you like a matte finish, you can stop after a couple of layers of topcoat. Otherwise, you can have more than three or four to get the glossy shine. When you have glitter on your nails, it is always better to go for a glossy finish. It adds to the glitter and ensures a high-quality manicure.

Buff the nail to remove excess glitter

The glitter could form bumps on your nail surface at times. You can run your fingers over the nails to know if there are bumps. Use a nail buff to remove the bumps and have a uniform coat gently. However, this procedure could leave a layer of dust on the surface. Remove the dust and apply another layer of topcoat. Cure the layer for around 60 seconds.

Wait for around 30 seconds and let the LDS gel nail polish settle down. Finally, you can apply a layer of cuticle oil to the nail to add to the shine. It also helps to keep your nail hydrated.

Final Thoughts

As you see, applying glitter is not challenging at all. It is as simple as applying your regular LDS gel nail polish. Experiment with your favorite colors and get the best-quality gel nail polish with glitter in town. Then, you can have these nails as your profile picture on your Instagram handles.

Post navigation

Previous post
Next post

Related Posts

The 8 Best Spooky Nail Ideas 2020

Now that we are still in the middle of a pandemic it does not mean that you should not enjoy your best moments. People are getting masked up, and that is good for Halloween but you still can add a little more vibe to your design by considering different spooky Halloween designs. You can use different sorts of nail polishes to create unique halloween nail designs gels, acrylics, or even dip polishes will do. So if you have your Kiara Sky, SNS, or DND nail polish colors, you should be prepared to spook your friends with the fanciest designs of the year. However, you still need to have the right ingredients for the task. Moreover, it does not imply that the most expensive polishes will give you the spookiest designs. You can still get some wholesale DND nail polish, SNS, gels, or acrylics that will serve you in the best way possible. Today, we will explore some of the best halloween nail designs to take away the boredom of the lockdown.

Best Spooky Nail Ideas

Boo Nails

Talking of spooky? Well, this design will freak you out. It has features like the ghost steaking its tongue out and the heart-eyed pumpkin as well as other details that make it exceptional. Perhaps you should try it out and see how it works for you.

(more…)
Read More

SNS Nails – A Nail Manicure with a Difference

Women and beauty go hand-in-hand. When you discuss hands, you have to discuss nail polish because a nail manicure is an ideal way to beautify your hands. Nail polish is in existence since time immemorial, as there are documented records to show women using some way or the other to beautify their nails. Over the last thirty years, there has been a tremendous revolution in the form of the invention of a new kind of nail polish, Dipping Powder.

We shall see the difference between the conventional gel polish and dipping powder in this blog. However, we emphasize that one should use high-quality products like SNS dip powder to beautify your nails and not the hundreds of spurious ones you find on the market.

Dipping Powder and Gel Manicure

  • Gel polish is different from dipping powder because it uses UV radiation to dry the polish. Dipping powder does not require such drying methods because they dry quickly.
  • Both gel and dipping powder polish lasts for two to three weeks.
  • The nails require less maintenance because it does not chip away when using gel polish and dipping powder.
  • Gel manicures give a glossy finish, whereas it is possible to have a matte finish with dipping powder.
  • Gel manicure exposes the skin to UV light at close range and hence can damage delicate skin. There is no such danger with dipping powder.
  • The gel polish removal procedure can weaken your nails because of chipping it away. The dipping powder removal process is a much smoother job.
  • One should note that some dip manicure formulas are not safe and illegal for use in some states like New York. Therefore, one should note this fact before going in for a nail manicure.
  • Though one can perform both these procedures at home, it is advisable to approach a professional to handle nail manicures. It ensures that you get the best SNS Nails ever.
(more…)
Read More

The Ideal Makeup Routine for Having a Youthful and Attractive Look

Does it ever happen that you look at someone and get awestruck by their beautiful, youthful makeup look? Whenever I see someone having such an attractive look, I am forced to think that they might be following a very hefty makeup routine. Just to confirm this, I even asked a few people what their makeup routine is to get such wonderfully attractive yet healthy skin. Surprisingly, the answers were quite simple and not at all what I expected. So I decided to compile all those learned things here so you can also benefit from them and get the look of your desires.

What causes aging or other skin condit during makeup?

Makeup products can pose severe harm to your skin if you have not chosen them correctly and carefully. This is because usually the ordinary quality products are rich in chemicals like parabens, sulphates and phthalates. These not only damage your skin apparently but also break down the cells from deep inside.

Also, there are a lot of makeup products that chip or flake out. This gives a worn off and tired look on your face. A lot of products increase the oil secretions or may clog the pores, making breakouts worse. So, your facial look largely depends on the products you apply.

How to include skin care remedies into your makeup routine?

Normally it happens that you don’t have enough time to perform a separate skincare routine. To address all the skin conditions you face because of applying makeup, you can do quite a simple thing. Just include your skincare within your daily makeup routine. Making little alterations in your makeup routine can largely help you in improving your skin’s texture. For example, if your ordinary bb cream is making your skin oily, you can substitute it. Just use the best bb cream for oily skin while doing makeup. It will not only give you the finest makeup look but will also control the oil production.

(more…)
Read More

Recent Posts

  • What Does a Tanning Bed Lotion Do: Things You Might Not Be Knowing
  • The Perfect Gel Color Nail Polish for Fair-skinned Women
  • How to Have Glitter on Your Gel Polish Nails at Home
  • Match Your OPI Nail Polish with Your Skin Tone
  • Which Will Be the Top Brand of Nail Supplies in This Fall?
©2025 Sweet and Woodsy